| |
 |
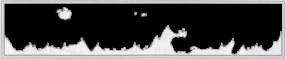
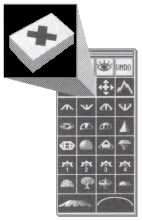
The Edit Screen is mostly black except for the initial star field. Your
mothership marks the position where a V-Wing fighter will be deployed on
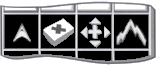
your planetoid. Also visible is the "Edit Palette" (shown at left) which
contains all the tools for building a planetoid.
The first step in building your planetoid is laying out the mountain terrain
with the "Mountain Tool." Select the Mountain Tool from the Edit Palette.
Now click in the Edit Screen and drag to the left or the
right. The terrain line will be drawn following the path of the mouse pointer.
|
|
| |
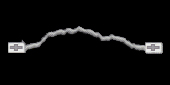 |
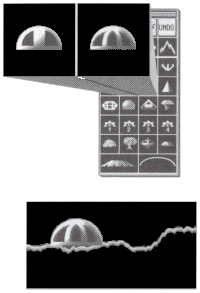
When you release the mouse button, you will see your terrain segment and two
small boxes with plus signs in them at each end. These plus
boxes indicate that the terrain is incomplete and needs to be added to at each
end.
|
|
|
Notice that the terrain line is thick and appears to fade downward to black.
This type of terrain is solid below it and has open space above it. Terrain
segments can also fade upward to black. Upward fading terrain is solid above
it and has open space below it.
|
| |
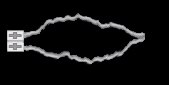 |
One way to complete your terrain segment is to make it into an asteroid. To do
that, click on one of the plus boxes and drag a line of terrain around in a
circle to meet with the other plus box. When you have drawn terrain all the way
to the other plus box, the ends will probably not quite meet up. This will leave
two plus boxes lined up vertically.
|
|
| |
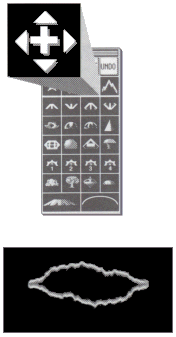 |
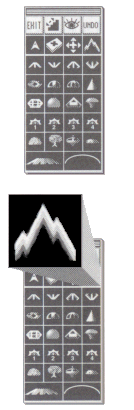
To fully complete your asteroid select the "Tweak Tool" (shown at left.) This
tool is mostly used to make fine adjustments to your scenery. Click the Tweak
Tool on one of the plus boxes and drag it over the top of the other. The
terrain will bend as you drag the plus box. When you have the plus boxes
directly on top of one another, release the mouse button. The plus boxes will
disappear indicating that the terrain segments have been "fused" together,
creating one solid object.
|
|
|
To complete the terrain of your simple planetoid, you will need to draw a
bottom surface. Select the Mountain Tool again and move the mouse pointer
down below the asteroid. Now click the Mountain Tool in the Edit Screen and
drag to the left or right. Keep dragging all the way to the edge of the screen.
When you get to the edge, the Edit Screen will move with your pointer as
mountain terrain is continously drawn. If you continue to draw in a straight
line, you will eventually meet with your starting position. This is because
planetoids are cylinder shaped. Draw mountain terrain right up to the starting
position and release the mouse button.
|
| |
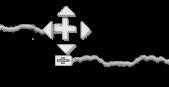 |
If you are again left with plus boxes which are lined up vertically, use the
Tweak Tool to fuse the ends.
|
|
| |
 |
You may have accidentally drawn past your starting position. In this case use
the "Eraser" to remove some of the excess terrain before you attempt to use the
Tweak Tool to connect the ends. Select the Eraser and click it on the terrain
segment that extends beyond your starting position to erase one piece of
terrain. If you press and drag, you can continously erase mountain terrain as
you pass over it with the Eraser.
|
|
 |
When you are trying to connect one end of a terrain line to its other end, as in
an asteroid or your planetoid surface, you must add or erase terrain until the
plus boxes are lined up vertically before you can tweak them together. Terrain
lines can only bend so far, so if the Tweak Tool refuses to pull the ends
together, you may have to redraw a portion of your mountain terrain to get the
plus boxes closer together.
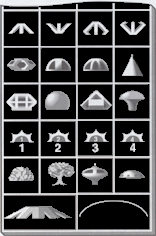
There are limitations in the complexity of planetoids. Because of this you can
draw an asteroid above your surface terrain or a cavern beneath your surface,
but you can't have an asteroid directly above where a cavern is.
|
| |
 |
All planetoids should have OIDS to rescue. OIDS are held captive in the little
dome shaped buildings called "Pods." To place a Pod on the mountains, select one
of the two types of Pods from the Edit Palette. Then position it on the terrain
surface and click the mouse button. You will now have a copy of the Pod drawn
in your planetoid. The Pods with two windows contain two OIDS and the ones with
three windows hold three OIDS.
|
|
|
Whenever there are OIDS to rescue on a planetoid, there must be a landing site
nearby for a V-Wing ship to land on. To create a landing site, select the Eraser
Tool and click it on a relatively flat terrain surface near the Pod. This will
clear the way for the landing surface. Now select the Mountain Tool and click
and hold on one of the plus boxes. Hold down the OPTION key and move the
mouse pointer up and down until you see the flat piece, releasing the mouse
button to draw it in. If the landing surface has a plus box on it, use the
Tweak Tool to nudge it into position.
|
 |
| |
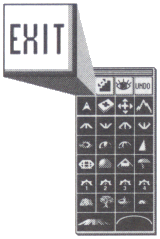 |
You have now completed a simple planetoid. Click on the "Exit" button from the
Edit Palette to return to the Galaxy Chooser. You will be asked if you would
like to keep the changes you made this session. After answering "Yes" to this,
the Edit Screen will fade out to the Galaxy Chooser. Now close your galaxy with
the "Close" button. You will be asked if you would like to save your changes to
the galaxy. Answer "Yes" to this and now you're ready to play your new galaxy!
|
|
| |
 |
Planetoid scenery can be composed of several types of objects. They are:
mountains, asteroids, caverns and stalactites.
|
|